A survival guide to everyday motherhood


About Me

My photo
I am a photography fanatic. I love taking pictures, tweaking pictures, and finding the beauty in every day items
Showing posts with label baby items. Show all posts

Wednesday, January 26, 2011

Baby Shower Cake - Jungle

Gotta love babies... especially the baby showers. I love the decorations, the food, chatting with the ladies... I love it all. This last shower that I threw I decided that I was going to step it up a notch and make my first baby shower cake. I was really surprised how easy it was to do. Seriously, this is my first cake!
I simply used box mixes, but instead of cooking them in circle pans, I cooked them in Cheesecake Pans to help that be perfectly even, plus they cool faster since you can take the side off while they cool. I used a Buttercream frosting too (for the first ti
me) and again... SUPER EASY! :)

All it was is...
Shorting 1/2 cup
Butter 1/2 cup (1 stick)
Powder Sugar 4 Cups (add one as a time)
Vanilla 1 tsp (clear vanilla if you want it to be white)
Milk 2 TBS

I doubled the frosting for this cake and it was plenty.

Mix shorting, butter (soften), vanilla till cream. Then add sugar one
cup at a time. The frosting will be a little stiff at this point, so now you will add the milk... this will make it the perfect medium stiffness. If you want to add color to the frosting... DO NOT ADD LIQUID DIE. It will ruin the stiffness... use coloring paste. They sell it a Walmart or Michaels and such.

What is great about this frosting is that you don't have to refrigerate it. So, you can start working on a cake a couple days in advance and it will still be great. In fact, I like the frosting to sit out and get a little more stiff after the cake is frosted.
Once you have the cake frosted you can then decorate it how you please. I used Candy Melts to make the leafs. I simply melted some green candy melts and drew them on wax paper with a picture of the leaf below. Once cooled, you peel them up a
nd glue them on (with more melted candy). They will stay really well.

The animals on top, I used my Cricut to cut out cute little animals. I cut them out and glued tooth picks to them, that helped me stick them on top.

The sides I decorated with the candy melts again. I simple grabbed some extra Candy Melts and glued them to the sides with melted Candy Melts.

I had a lot of fun with this cake and it tasted fantastic! I used a couple tools that helped make it easier to do things.
A cake lifter really helped me move the cakes from the pans
to the tray I was serving it on. Truly helpful. Also, a flat spatula made it possible to evenly spread the frosting through out the cake.

Tuesday, October 14, 2008

How To Make Baby Leggings

There are so many baby items out there that are completely unnecessary, but made to sound like if you want to be a good mommy, then you HAVE to buy it! I don't know about you, but I think I am a pretty good mom even though I didn't buy the Pottery Barn silk lined, gold rimmed, organic wipe dispenser.. and better yet.. my child has survived the barbaric use of un-organic items and knock off brands. But hey.... just because I don't have the money to buy them, doesn't mean that I wouldn't mind having some.

A good example are those adorable baby-leggings. I think they are just so dang cute, but unfortunately I can't get myself to buy something that, technically, I can live without.... I guess. But this is where I get my cake and eat it too :)

I found a quick little tutorial for making home made baby leggings and they are pretty easy. The instructions provided are a little vague which makes them sound way more complicated than they really are... but just using common sense will help. I made two pairs and they turned out well. They do pucker a little on the cuff and I couldn't figure out how to make it smoother, but still cute.
So, if you are wanting to try out this quick tutorial then go check out the baby-leggings.

Tuesday, September 30, 2008

Fabric Diaper Case

I am probably not the most organized person... well, probably more like I can't even keep the word organized in order. Because of this fault I find myself a sucker for organizers, holders, pouches, and such.

Ever since I have seen those super cute diaper & wipe cases, I have been in love... no...wait... in LUST! But I just can't get myself to spend $12 on something that will hold diapers. I like to organize, but I am still cheap. So instead, I decided to make one.

Measure and cut out two squares from paper, one measureing 10 x 7.5 and the other 14 x 7.5. The smaller square will be the pattern for the front of the case and the 14 x 7.5 will be the back/tab. After this you can cut from the fabric now. Cut 2 pieces of fabric with the 10 x 7.5 square, one outter layer and one inner layer. Also cut 2 pieces of fabric with the 14 x 7.5 square, one inner and one outter.

Take your two pieces of 10 x 7.5 squares and place them face side up together. Sew the pieces together, but leave a small opening on one side (near the bottom) so you can turn the piece right side out again.

For the 14 x 7.5 squares, pin them face side up together. Take a dinner plate to use the round edge to trace a nice round smooth end. Now go ahead and sew the pieces together and on the round end you traced.... again, make sure to keep a little bit unsewn (near the bottom) so you can turn it right side out.

Now that you have both pieces sewn and turned correctly out, take the two pieces and place them again right side up together and sew the pieces. Once down, turn correct side out. Go ahead and sew your button on.

Impressed? Now you have one prettty hip AND cheap diaper and wipe case. I have posted pictures, but they aren't showing exactly what I said to do because I made these instructions up as I went. So I figured out what worked and what didn't. So, follow the instructions and take the pictures as loosly based guidelines :)

Thursday, September 11, 2008

Cute Baby Shoes


Lucy never wears shoes.... heck... what am I saying? She never even wears socks! She hates them, she kicks them off, and even growls like a cougar sometimes when they are on. So, that is a battle that I have given up on and let her little piggies roam free. But with winter in Alaska coming I am being forced to get ready for piggy war again.

With me really dreading this whole fit-fest that she will be throwing with every sock I put on... I figured that I needed something to look forward to... and I found it. Winter doesn't just make socks necessary, but SHOES too! I love buying cute shoes... I don't even care that they aren't for me! So, since I have been out on the shoe hunt, I have stumbled across one cute website, "Cute Baby Shoes".

"Cute Baby Shoes" are a soft soled shoes that are said to be the best for developing feet. Comfort, development and protection of your baby's feet is their pledge. Their sensible footwear is highly acclaimed by experts and parents alike. With fun designs, quality leather, and cotton lining your children are bound to love. With cute froggie shoes for your prince charming, ballerina shoes for your dancer, or footballs for your sports fan, you will probably find something unique to your liking.
.
If you have been needing shoes for your kids ages newborn to 4 years old then go check out Cute Baby Shoes and find your baby's sole mate. :)

Tuesday, September 9, 2008

Butterfly Onesie Tutorial

I love jazzing up little outfits for Lucy. Its always nice to be able to add something to a shirt besides a stain. I did this adorable button butterfly on a onesie, but plan on adding it to also to a t-shirt that she can wear when she is older. So, if you are looking to spice up something from sour to sweet, then here you go. All you need is...

Fabric (2 patterns)
Heat n' Bond (you can get this at a fabric store, usually held behind the counter)
Embroidery Thread
Embroidery hoop (this is recommended but not required)
4 Buttons
Onesie

1. Find a butterfly shape that you like by either drawing it yourself or finding an image you like. You don't need the details of it, just the shape/outline. Once you have the shape/size you like, cut it out and put it aside.

2. Take your fabric and the Heat N' Bond and cut out squares of fabric that will hold the butterfly. Make sure you have two squares of fabric and two squares of the Heat N' Bond. Now iron each fabric square to one Heat N' Bond square. Follow the Heat N' Bond instructions and make sure that you bond squares isn't bigger than your fabric, because when you iron the two together, if it is over lapping, you will get the glue stuck on your iron... so be careful :)

3. Take your butterfly image and use it as a pattern to cut out what you need from the fabric/bonding squares. I used one pattern for the top wings and the other fabric pattern for the bottom wings. When you have your two wings cuts out lay them out on your onesie where you want them to go. When you have it the way you like it, go ahead and iron the butterfly to the onesie. Remember to follow the Heat N' Bond instructions also.

4. Now you have one butterfly completely attached to your onesie. Place your embroidery hoop inside the onesie, around the butterfly, make sure it is nice and snug. Now you can start to stitch with the embroidery thread. I did a simple up & down stitch around just the edge of the wings. I also used two different colors, one for the top wings and another for the bottom.
.
5. When the embroidery is done, you can now sew on the buttons. You will need two for the body and two for the antennas. Sew the body buttons on first and then the antenna buttons last, save them for last because it will help you to be able to see where they should go better. When the antennas buttons are sewn on, go ahead and stitch a line that will link the antennas buttons to the butterfly's body.
.
Now you have one dang cute onesie that will make your baby the bell of the ball. I am also probably going to add one to a simple jacket of her's, so she can have a matching outfit. If you are looking for some more patterns for boy or a girl, then check out my sheep onesie.

P.S. I was thinking about hosting a contest with these embellishments. Having people make some of their own and then sending me a photo and I would post every ones on my blog and letting you all pick the winner. If I did this would people be interested, because I would want at least 6- 8 people to enter, but the MORE the MERRIER :)

Monday, August 11, 2008

Fabric Baby Blocks Tutorial

I love making toys and clothes for Lucy, not only does it give me something to do during the day besides trying to figure out what she has just put in her mouth now, but I also love that feeling when I get to see her enjoy a toy that I made for her. One toy that she goes crazy for are her fabric blocks. They are one of the simplest things to make... well maybe not as simple as ordering from Pottery Barn, but you get the idea :).
.
All of you out there that are stillll thinking that you can't sew, then this project is for you... seriously. All you need to do it is cut out 6 squares of fabric, they can all be the same or all different. The best way to sew them together is to make a "T", having 4 squares in a row with one square on the left AND right of the second square in the row.... like a "t".


When the row is sewn together then sew one of the extended squares to the completed row , this will be when it starts to take it's 3D form... it should have all cubed sides except for the top one, which should still be flapped open. The cube should be inside out still. Sew the last square to the cube, sew all sides but one. When you only have that last sideleft, flip the cube correct side out, stuff the cube with stuffing and a bell if you want it to jiggle, then hand stitch the last edge and now you have a homemade fabric block for your baby :)


You can really spice these up with adding bells inside, putting numbers and letter on the outside, or adding little tags to the edges for baby to play with.... you could really let your imagination run wild.

Thursday, July 31, 2008

Mommy & Me Sweaters

I remember before I had Lucy, seeing moms and thinking how so many of them were soooo cheesy. Buying silly frilly outfits, making the whole family match for photos, and getting matching mommy and daughter clothes.... I just thought it was ridiculous. Then slowly, I found myself buying cute frilly girl things, planing family photos with in sync clothes.... and .... GASP!!!! Even eye-balling mommy and daughter clothes!!!! NOOOOOOOOO! What happened to me? I was the cool mommy, buying converse shoes for my little girl, planning snowboarding trips with our daughter, and fitting her in little fitted beanies..... she was hip... she was cool... and so was I! But no... I look back, and it has been slowly slipping away.

The final nail in my "new mommy-chique taste" coffin, was when I saw these adorable matching sweaters from Harriet & Leo and actually thought how cute it would be to have them. How sweet would it have been in the recovery room of the hospital, wrapped up tight in these warm sweet cardigans, with your beautiful new addition in a matching one as well. Cheesy, I know... but still SOOOOOO cute.

These are exclusively designed, having one sweater for mommy and one for your little baby. The little baby's sweater is folded into the mommy's; the mommy tag says, 'Congratulations!' and baby's says 'Welcome!'. They even have a cord that connects the two together, that you separate when you are ready to use them. They come in pink, baby blue, and a nice turquoise/teal-like blue.

What is fun about these is that you don't have to be a mommy; grandmas can buy these for themselves and their grandchild or they would be a really sweet baby present. They are pricey, selling for $85.00. Would I have forked out the money when I had my daughter? Probably not, but you are getting 2 sweaters for something so sweet and cutely cheesy :)

Potty Training

If you are getting ready to OR are in the middle of trying to potty train your child, you can sign up for a FREE potty training kit at Pamers - here. It comes with stickers, a chart, some tips, and even a Dora the Explorer or Diego trophy!

Wednesday, July 9, 2008

Crafts Projects and Tutorials

I always have more on my plate than I can handle. I am always wanting to start something new, learn a new hobbies, or start some crazy idea I have. I have gone from learning to scrapbook, to knitting, sewing, baking, quilting, decorating, to wanting to make jewelry... that is all in a few months. But some I have really stuck with more and others, well, I learned and got too excited for the next project... so I moved on. So, here is a list of crafts I am wanting and hoping to do here soon.

This is from the Martha Stewart website and has a tutorial, written instructions, and even other readers reviews of the craft. But does that just scream, "Oooober cute!"?

These are the cutest shopping bags that I have ever seen... heck... I would use it for an everyday purse! So whether you are looking to make a fashion statement or an environmental statement, then you might want to check out these bags.

I have been dying to buy or make one of these. I saw one in a magazine ad and ever since I have been looking for some tutorials. Besides just being cute they are also convenient. Keep diapers and baby wipes close and all together.... honestly, what mom isn't look for things to make their lives a little easier?

Looking for a cute growth chart? Here is one that would look good out of the kid's bedrooms and if you are looking for one that is more suited for a kid's room, then in a couple simple changes it could be done. I am going to try to change this one into a more tropical theme chart for my daughter's room... maybe a palm tree or a flamingo.

This is a beautiful one of a kind home treasure. Simply take a favorite photo of a child, use it to cut out fabric and make a heart melting work of art. What a wonderful gift for grandparents or even a cute nursery decoration.

Yep... that is right. A reusable sandwich bag! A cute project that will always spruce up hubbies or the kids' lunch bags. Plus, save some good money on zippy bags.

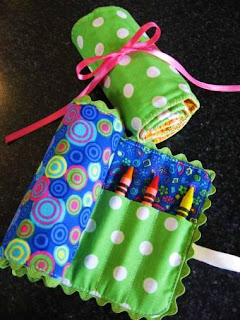
This one seems a little more complicated and a little more work than you would have to do, but it could be made easier by not sewing on the trim. I think this craft is creative and a great way to keep crayons in your bag for trips and maybe the crayons wont break as afteb in the soft fabric.
.
These are some cute and fun stuffed animals that you can make from left over sock or gloves that are just laying around the house. There is a book called, "Sock and Glove" by Miyako Kanamori and it is just wonderfully cute! I just bought a copy of it and am excited to get started, but recently she was on Martha Stewart and they posted step by step instructions to make a dog and bunny.

This is a very simple and interesting craft. By taking a scrapbook punch and using it with different paper, you can have your self a fun work of art. Easy to make for child's room, office, or fun kitchen decor.

I always have toys laying around and I only have 1 kid... so I don't know about you other moms... but I need a place to put them. Here is a cute, homemade toy bag that has endless possibilities.

Okay, I just can't get enough of this. Check out this LOVELY tree collage that I am just dying to make. If you don't think this is cute...well then, I just don't know what to do with you :)

What a gorgeous breakfast tray that is really one of a kind. This is a functioning tray or a beautiful decoration or even a nice gift.

So hopefully there is something here that will tickle your fancy and if it doesn't, at least I have a small list of things that I need to complete and do. I probably wont be doing any at least until hubby's payday :) Soooo, hurry up Friday!

Monday, June 23, 2008

Unique Baby Onesies

If you all haven't noticed, I have been kind of getting into embroidery. Ever since I made those old fashion dish towels I have been trying to find more and more things I can stitch... and apparently, since my husband isn't up for me stitching hearts on his underwear, I have had to find other items to spruce up.

So, since I am always looking for new baby items to make, gifts I can give away, and looking for new embroidery projects.... I figured, "Hey! Why not mix all three?". So, I have gone and made myself some sweet applique baby onesies. They are super cute for your kids, wonderful gifts to give to new mommies, and a fun easy project. All you need is....

Baby onesies
Several different fabric patterns
Heat N Bond Fusible Fabric 'light weight'(They will have this behind the counter at Joanne's)
Pins
Needle
Embroidery thread
Embroidery hoop
.
First, find a template or draw a character that you want to sew on, I chose to draw a sheep. Once drawn, cut out the image so you can use it as your pattern. Make sure to cut out all layers; like for my sheep I needed to cut out the body, plus the legs and face. You may draw two copies of your image if that helps.

Now that you have an idea of how big the character will be, lay it out on the fabric and the Heat N Bond to get an idea of how much you will be needing. Cut out an area from the fabric and Heat N Bond that will be enough for the sheep/item. Now, follow the Heat N Bond instructions and iron the fabric and Bond together, leaving the plastic peeling layer on the back.

Once it is cooled and the fabric/bond are sealed together, you can cut out your pattern. When they are all cut out, place them where you would like them on the onesie. When you are satisfied, peel the plastic covers off the back of the Heat N Bond and stick them to the onesie. Now that everything is in place, follow the instructions on the Heat N Bond and iron the whole image onto the onesie. Now you have your character completely sealed to the shirt.

This is where you take your hoop and start to stitch around the sheep to give it a nice applique look. I used a different color thread for the body than I did with the head and legs, to help give it more color. I use a simple up and down stitch for the edging and when you are done with that... you are finished. Now you have your self a pretty darn cute, one of a kind onesie!

P.S. I am also making matching booties with the left over fabric, if you would like that also, you can find the template and pattern for those here.

Thursday, June 5, 2008

Walking Wings

.
I have a new piece of eye candy! And no, it isn't a man, it is a baby walker! It's a harness made to help babies learn to walk without having to have their hands held and I have been wanting it. With this walker, parents can support and hold their kid's without giving them the wrong balance and putting the all that stress on the arms.

It is called Walking Wings and it looks heavenly. It has a padded harness that goes around your kids chest. There are straps and handles in the back that the parent holds to help keep the kid up and balanced. It is great because you don't have to bend over anymore to help walk your baby; plus it is better on their little arms. I know I have almost hurt our sweet Lucy by holding her arms, especially when she looses her balance.

The Walking Wings aren't suppose to make your child walk completely correct, but to help your child walk more naturally and safely. The risk of arms being pulled out of their socket is slim to none when using the harness. Plus, I think it looks dang cute with your kid walking and waddling their cute way around.

These Walking Wings seem to be intended for all children, but they especially seem to help children who have no interest in walking, having a hard time with walking, preemie babies with difficulties, and even with some that have physical therapy needs. So, if your child is physically having a more difficult time with taking step, this might be an option.

So check out their website that has all their information on the Walking Wings and see for your self.

Tuesday, May 27, 2008

Mod Mum Baby Sling Review

WFMW

A few weeks ago I was approached by Mod Mum and asked if I wanted to review a baby sling that they sell and well.... I was ..... EXCITED! My very first review... wow.... I felt so honored.... I mean... you like me.... you really like me :) So as you can tell I have been looking forward to trying out the baby sling. So, patiently I have been looking and waiting for the mailman to drop off a package for me. I have to admit that I was cruelly teased the whole time because my sister just happened to order a bunch of clothes around the same time and every time one of her boxes came, I got all excited and was ready to tear it open..... and then I see it..... "Melanie Nichols". Ouch! So, I push aside the box and would wait some more.
.
So now the baby sling is here and I have to say that I was very surprised. I have seen many moms with slings, wraps, straps and what ever you could think of and I have to admit that... I never liked them. I always thought they were a bit hippie-ish and frumpy. But this one... this one is different.

First of all, it is one nice smooth piece of fabric... no wrapping, tying, or hot gluing to keep it in place. You simply slip it over your head onto your shoulders and done. The sling is also made of a lighter more breathable fabric. I have seen some that slings that have so much padding and layers that they can get a little toasty for me and for my Lucy. I was very glad that there wasn't a heat problem with Mod Mum.

The slings are great for several different ways of carrying your child. You can either cradle carry (which is good from newborn - 9 months), front carry (which is 2-8 months), and hip carry (for 6 months and up for 35 lbs). I love this because it gives moms the chance to let their babies grow with the sling. Certain position are better at certain ages. Lucy seemed to prefer the front carry; she could see out, be close to me, and still be snug. But in a few months she will be better suited for the hip carry.

These slings are a little more expensive then some I have seen, but I think they are worth the extra money. Especially since I usually get a sore back from some of the baby carriers out there, but this one didn't seem to bother me. They do range in pricing from $48 to $64, depending on what patterned fabric you want. But my favorite thing about all their slings, besides having CUTE patterns, no wrapping needed , good for all sizes and ages.... was that Lucy loved it. She babbled and cooed and played with the fabric the whole time. She was pretty comfortable in all the positions and loved having a view with the front and hip carry.

These really are some of the best baby slings I have seen and I have even fought buying one for a while now. I just never tried one that I liked completely with how it felt or it didn't look cute or I could tell in a few months she wasn't going to like laying in that position. But this one passed with flying colors. So, if you are looking for a sling, a good baby shower present, or something to just help you keep your baby from crying while you are trying to cook dinner.... try Mod Mums slings.
.
You can check out there sizing, styles, and instructions on how to wear them properly on their website also. And remember when ordering a size take everything into consideration... waist, shoulders, and your babies size. I ordered a Large and it seems a little loose in my shoulders, but also I have super small shoulders... so look at everything. The website provides a good table to show their suggestions.